Tuesday, March 6, 2012

Well, aren't you crafty...

Pinterest is starting to become my challenge.  With all the DIY and what not on there, I find myself wanting to prove that I actually can complete one  or two of the projects I've pinned.  There are so many, and I have been in quite the "arts and crafts" mood lately - not quite sure why.  Let's not forget my desire to procrastinate doing what I should be doing.  So I decided to try out this wreath I saw and pinned.  The original site is in Japanese, but fortunately, the picture tutorial was pretty simple to follow.

The necessities
You'll need:

  • 1 foam wreath
  • 1 spool of flowers that have a colored center - daisies are good.
  • Some pins that match the center color of the flower
  • 3 rolls of green fun fur yarn

On a side note about the yarn...it was close to impossible to find that yarn in green.  I went to two different Michael's, an A.C. Moore, AND a closed Hobby Lobby before I wizened up and called Jo Ann Fabrics, who, Thank God!, had the yarn.


Begin by simply wrapping the yarn around the wreath.  This can get tricky since the yarn tends to want to fold into itself and knot up.  I'm sure there's a way for you to crochet it on, but I wasn't feeling THAT crafty.
Once it's all wrapped in the yarn - 2 full rolls and most of the 3rd - it'll look like this.

Take your flowers and pin them onto your wreath using the pins.  You want to get as close to the center as possible so that the pin actually looks like it's part of the flower.

Get coordinating ribbon and cut it to the length you want.  Tie the ends.
You want to wrap the ribbon around the wreath and pull through so it makes a nice hanging loop.

Voila!  The finished product after you've put the ribbon on.

Not too shabby...wish my flowers were a little bigger, but oh well.

Saturday, March 3, 2012

Saturday afternoon nom noms

So I've been living on Pinterest pretty much since I was sent an invite to check it out.  There are so many ideas I've pinned, but haven't tried.  I decided to end that streak today. Why you ask?  Because in the grand scheme of my life, I'm procrastinating doing what I should do - i.e. cleaning off what The Husband calls "Aimee Central" from the dining room table.

I decided to start small today and figured I'd try the mozzarella, pesto, and tomato grilled cheese sandwich I pinned to my food and drink board.

The necessary ingredients
You'll need:
  • slices of mozzarella cheese
  • 2 slices of bread (I know I have white bread there, rather than some good bread - it was on sale, so sue me!)
  • sliced Roma tomatoes
  • pesto - you can buy it or make it
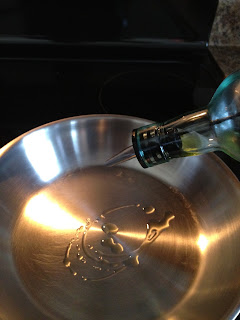
Drizzle a little olive oil in the pan 
Spread one side of the bread with pesto, add the tomato slices (sprinkle with a little salt and pepper), and the cheese.  Add the other slice of bread and set the stove to medium heat.

If you don't have a panini maker, you can simply use another pan to flatten the 2 slices of bread. Flip the sandwich and add the other pan to flatten.

Ok, so it came out a little crispier than I'd planned, but for my 1st attempt at "gourmet" sandwich, overall, not bad.  It was tasty and the sea salt and cracked pepper kettle chips went well.
Related Posts Plugin for WordPress, Blogger...